
Use AOMEI (or similar backup software) to protect your data from hardware failure, malware, accidental deletion, or system crashes. These tools offer:
- Full system image backups for complete OS and program recovery
- Automatic backup scheduling—no manual work needed
- Disk or partition cloning for easy drive upgrades
- Fast recovery with minimal downtime
They give you reliable, flexible, and hassle-free data protection.
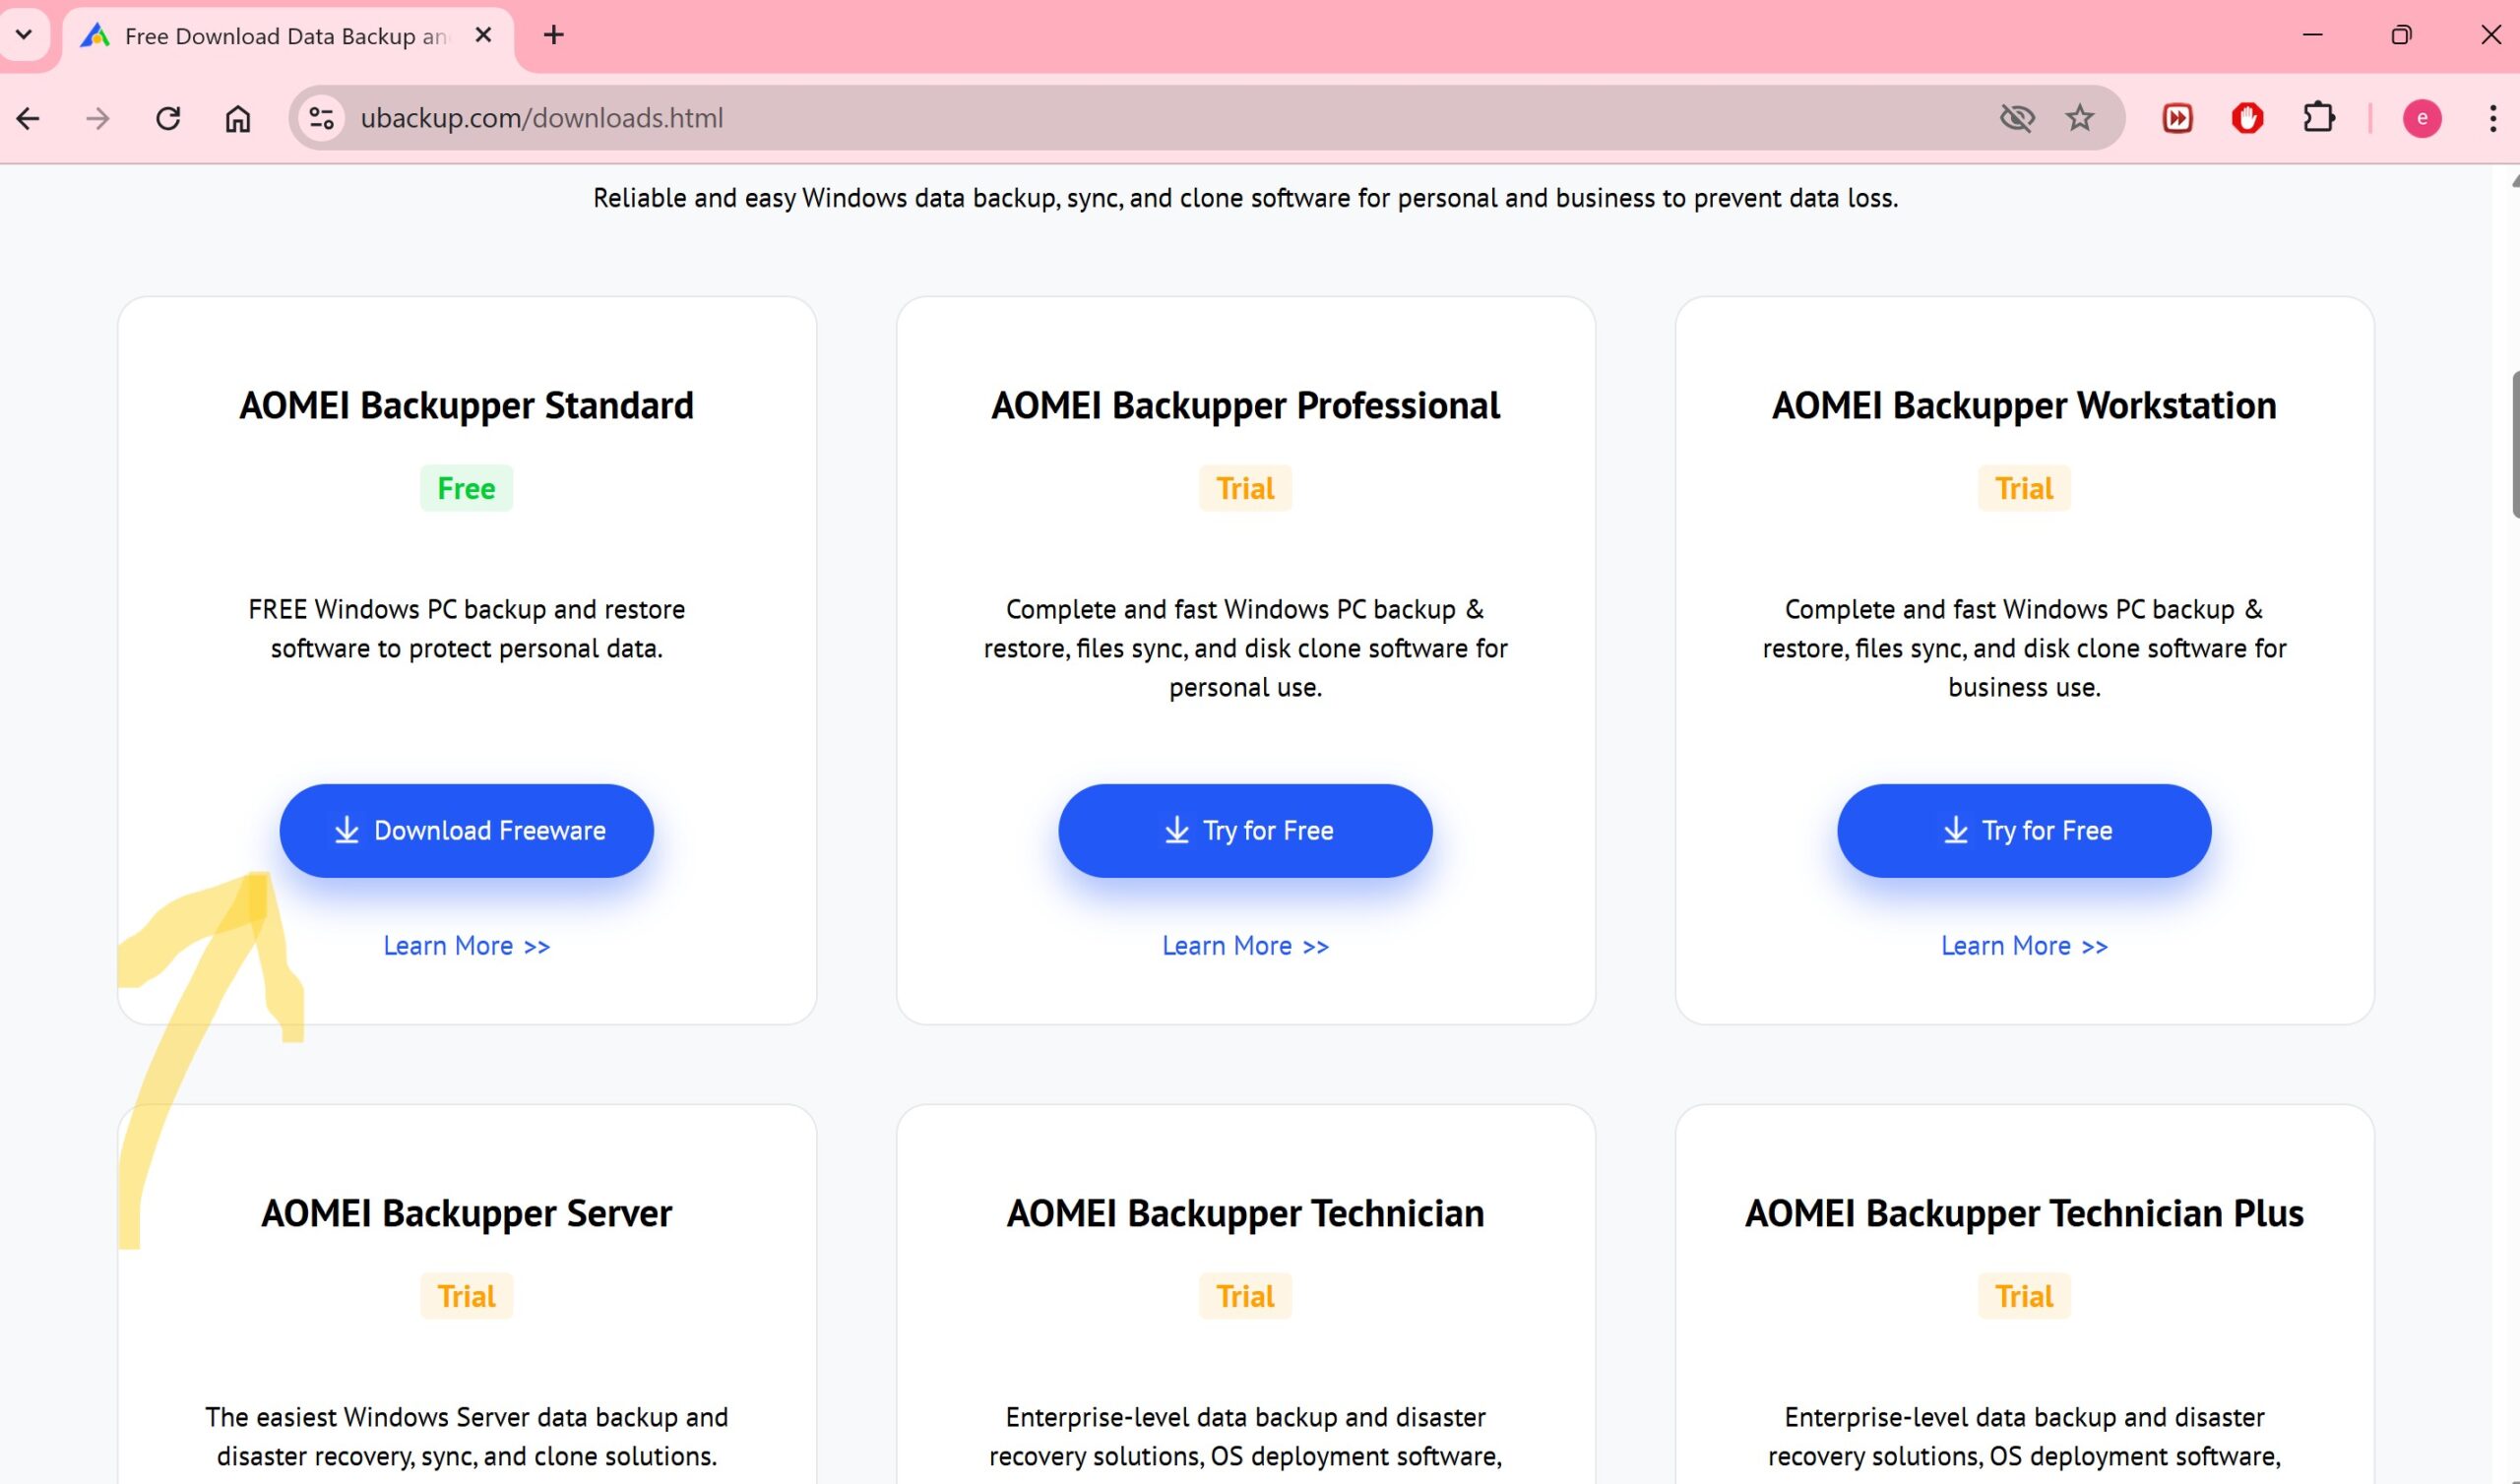
✅ Step 1: Download and Install AOMEI Backupper
Head over to the official AOMEI website:
- Click on the “Download Freeware” button.
- Install the software on your Windows PC like any other application.
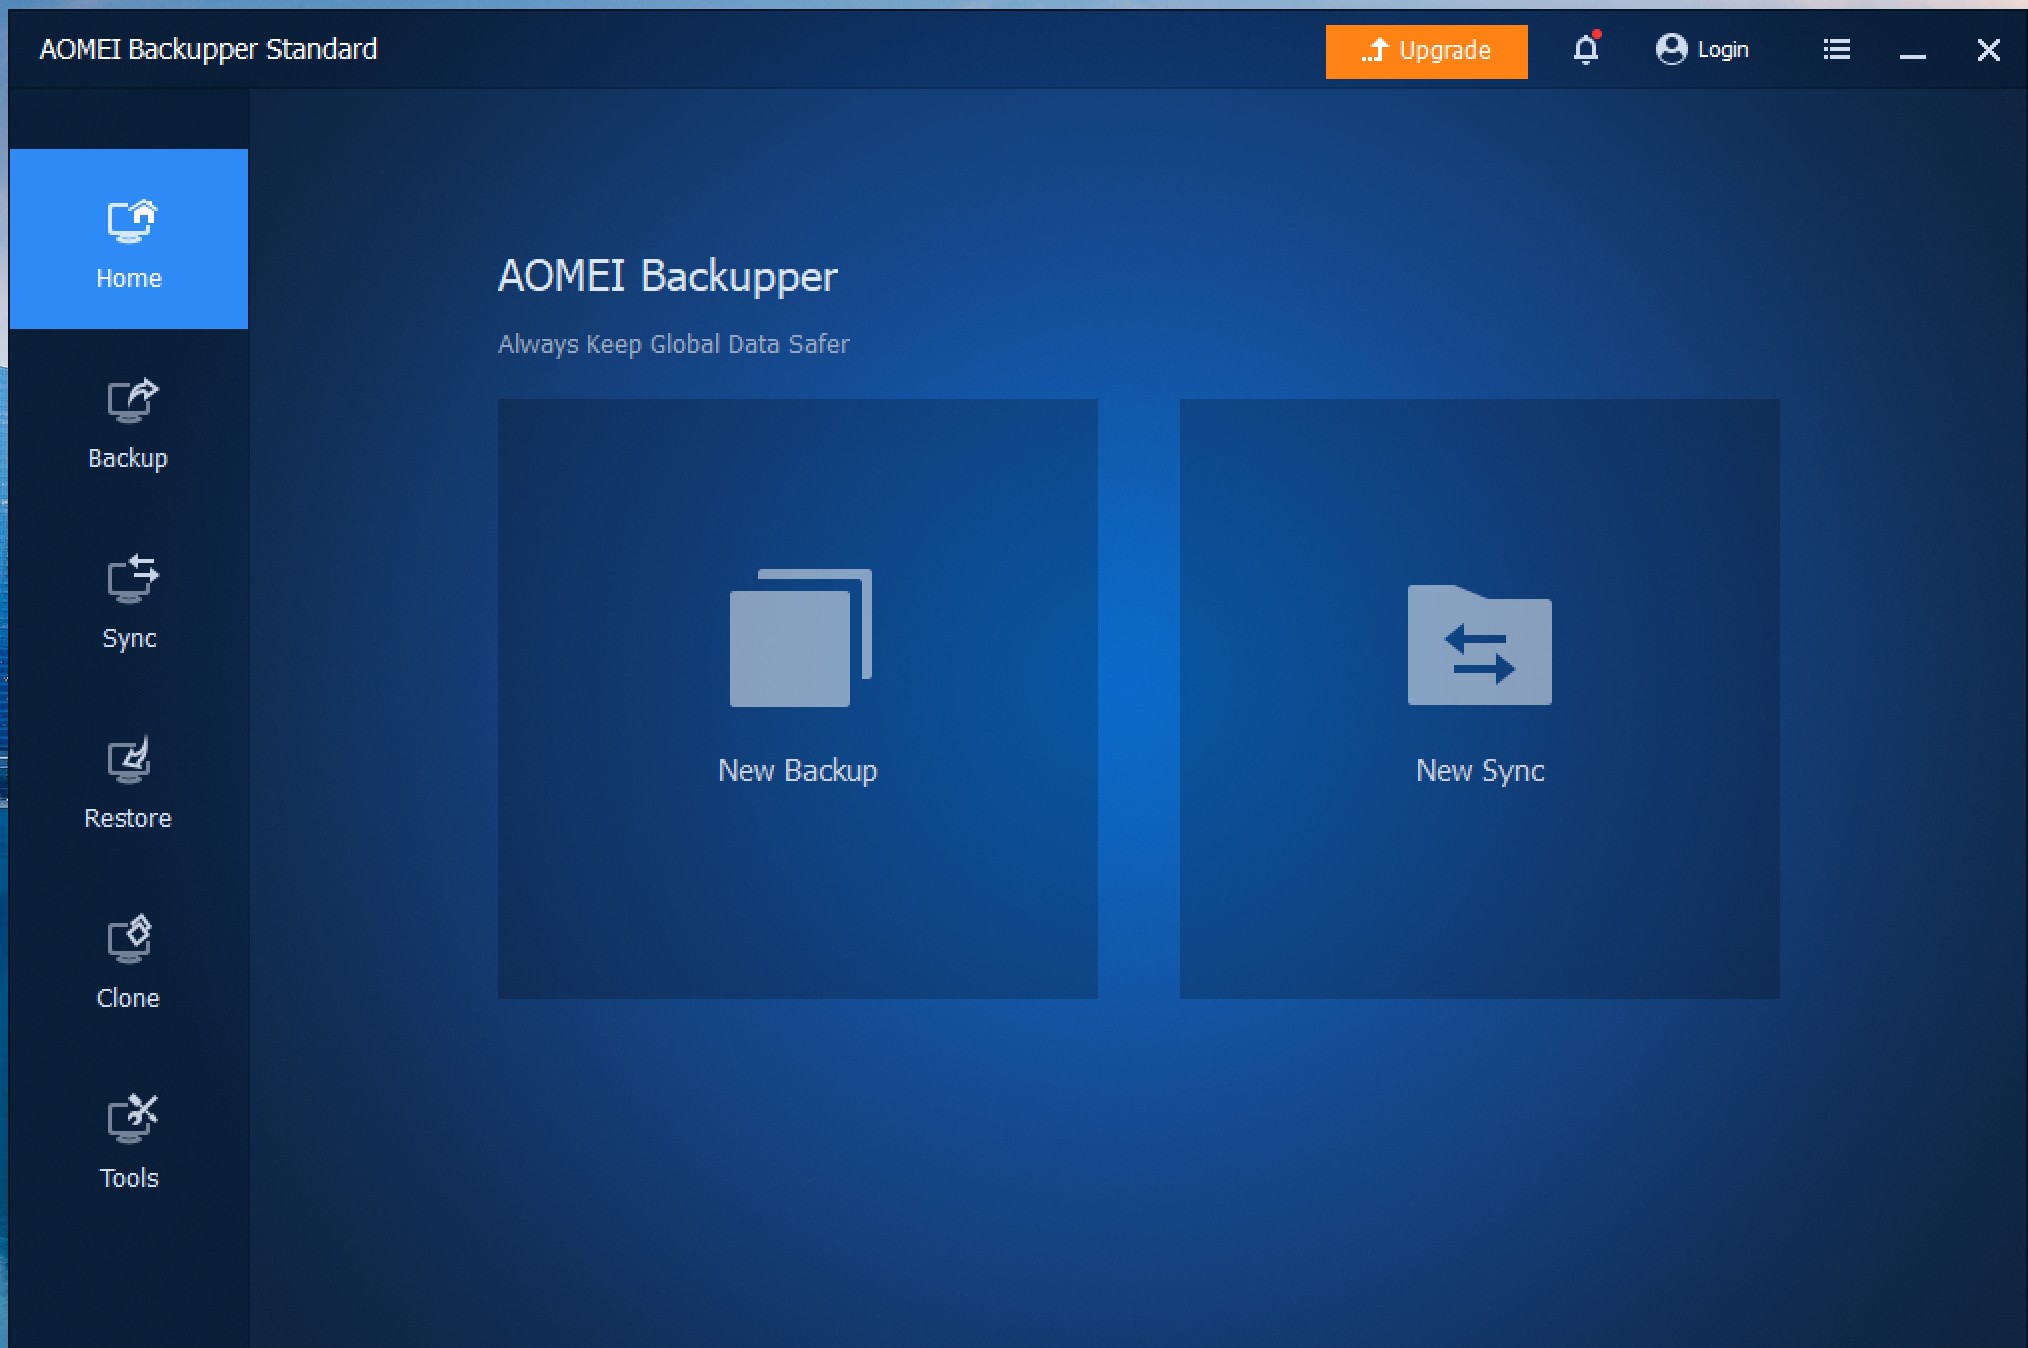
✅ Step 2: Launch AOMEI Backupper
Once installation is complete:
- Open AOMEI Backupper Standard
- You’ll see a clean interface with tabs like Home, Backup, Restore, and more.
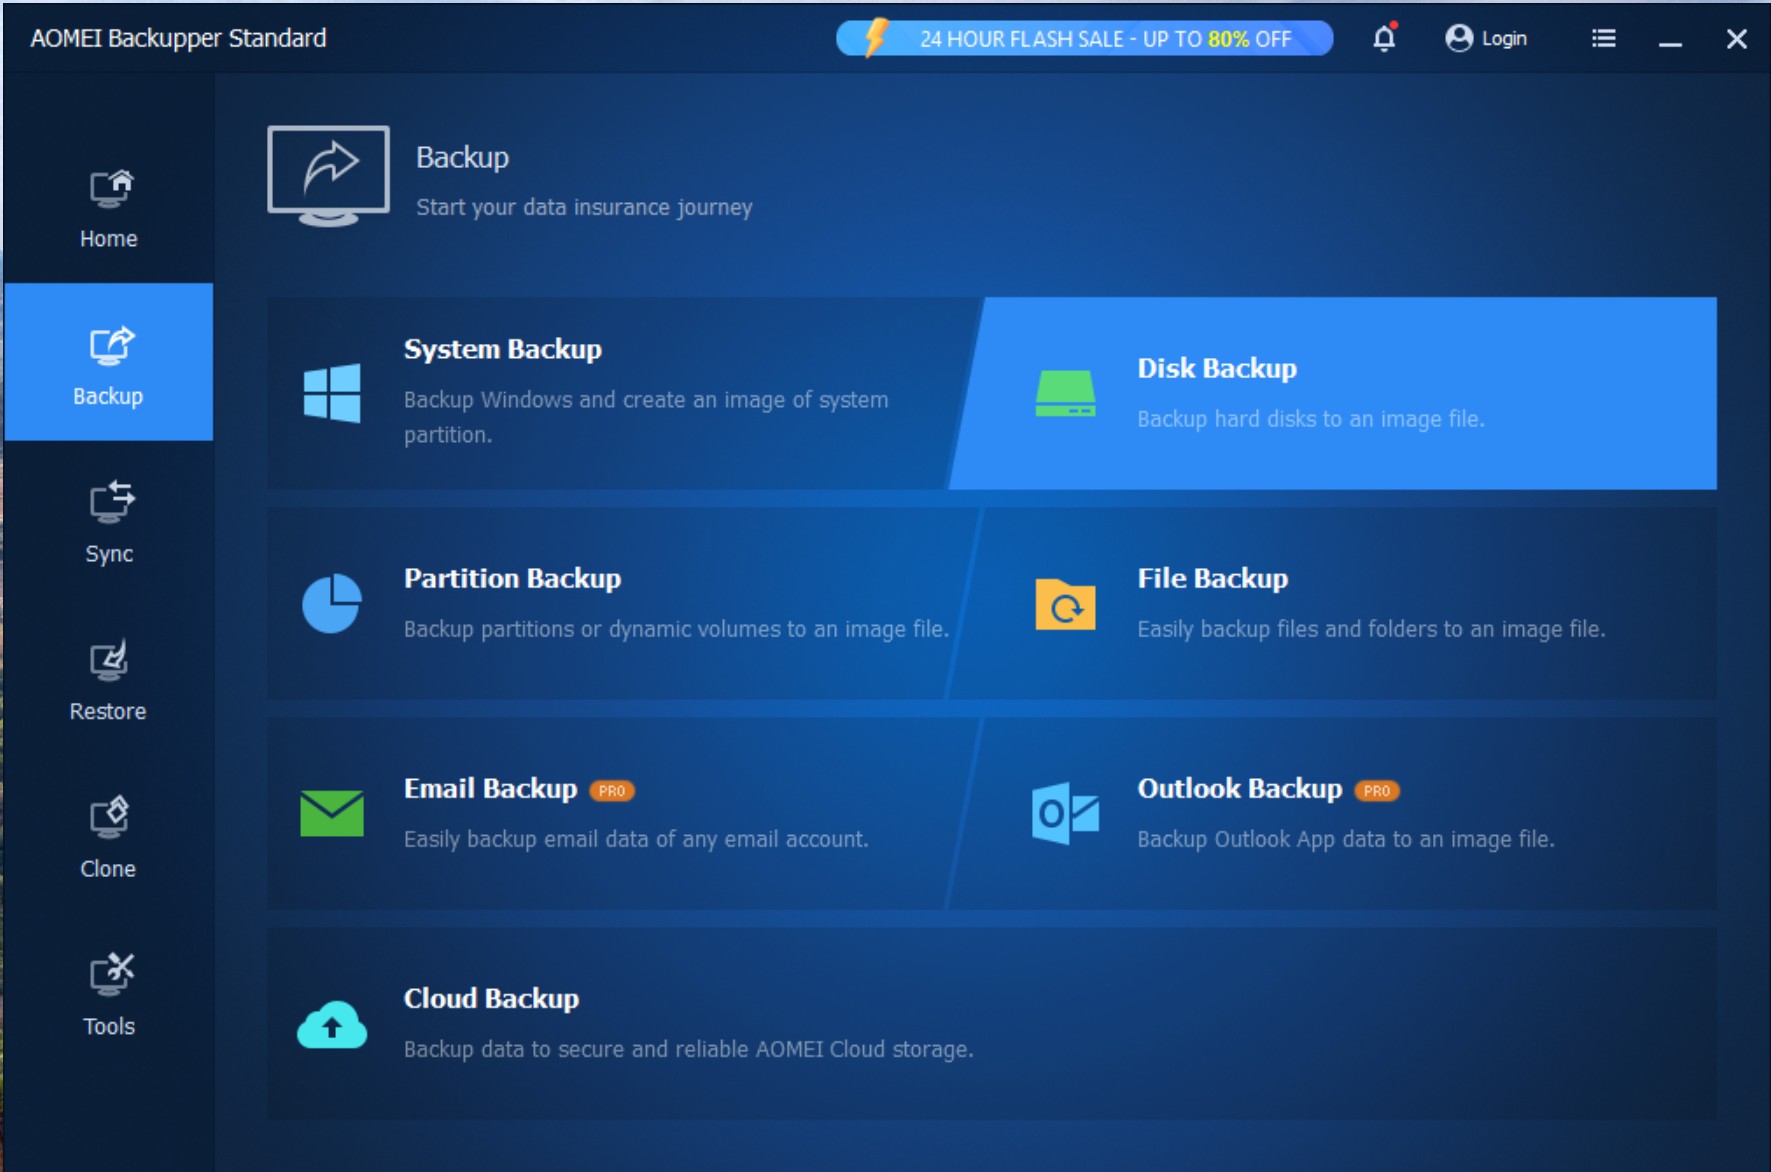
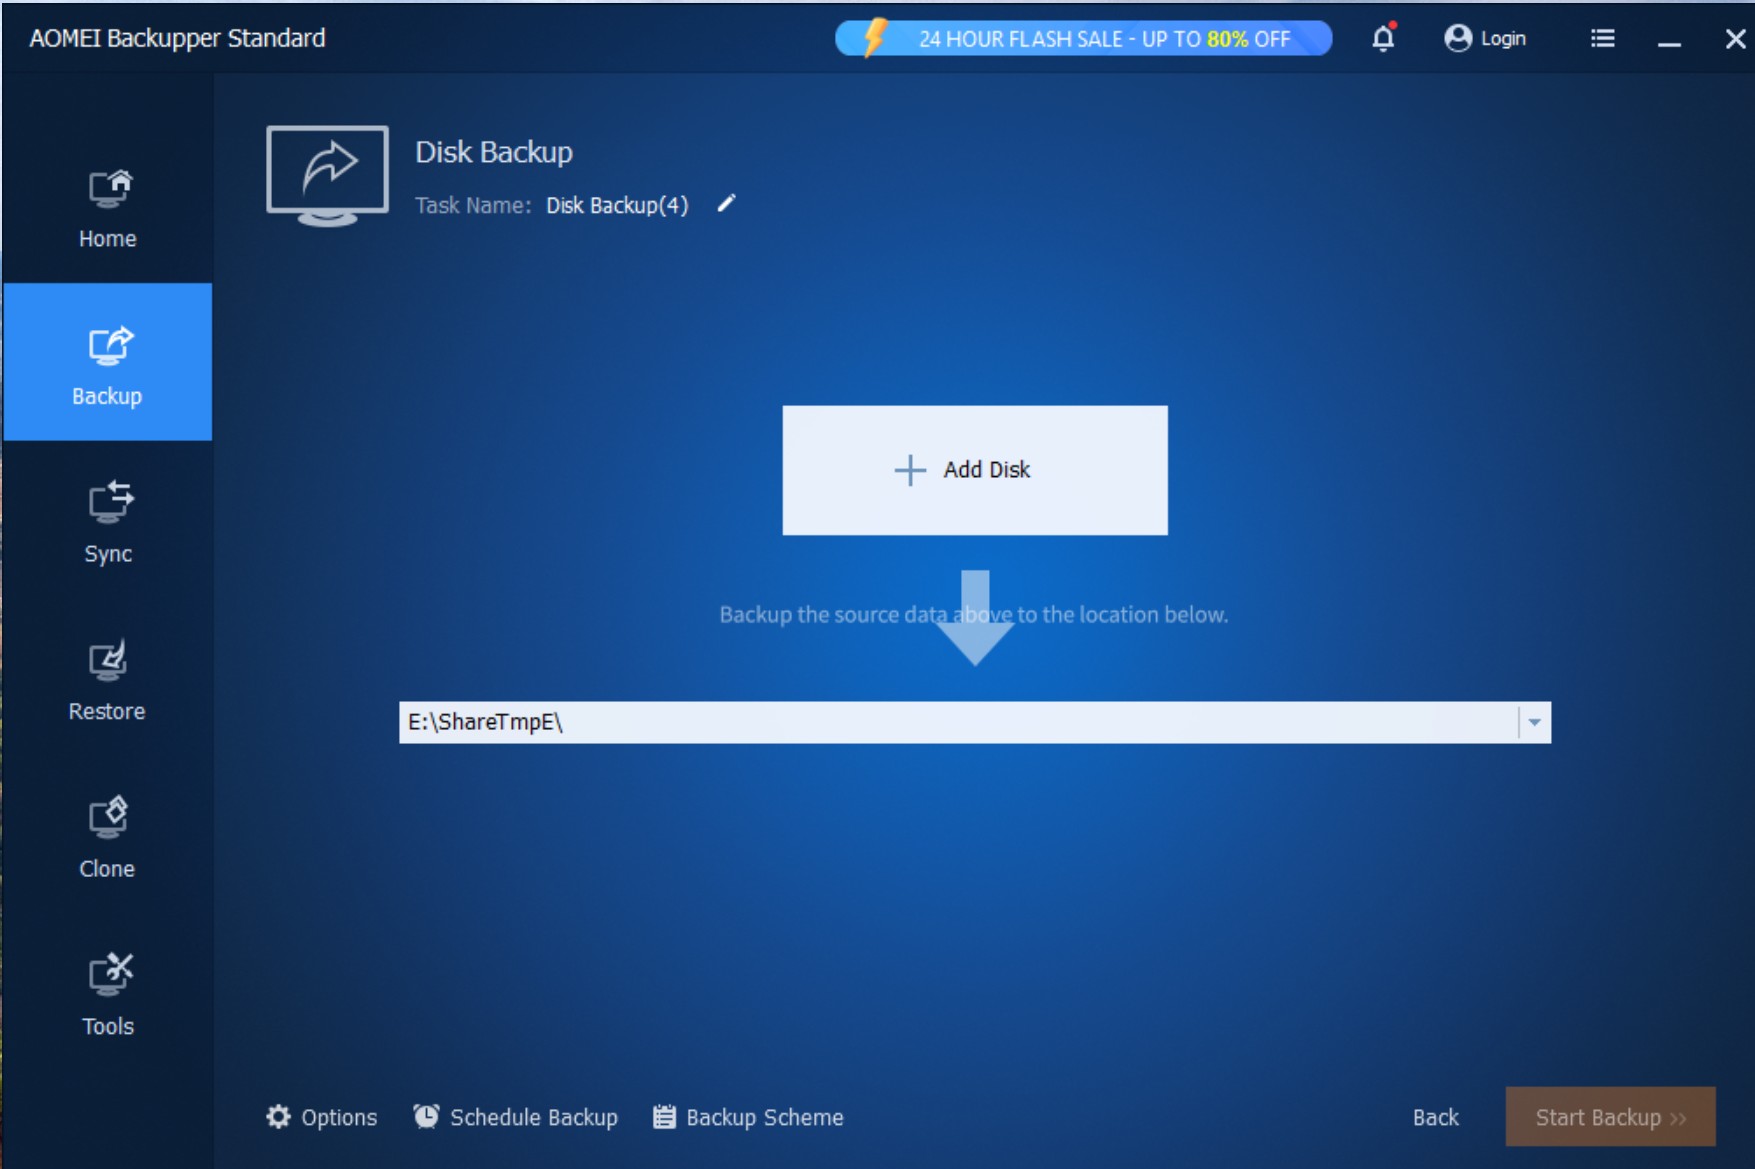
✅ Step 3: Choose Your Backup Type
Click on the Backup tab and choose your desired backup type.
We recommend starting with Disk Backup for full protection.
📝 Other options include:
- File Backup – for documents, photos, and folders
- Disk Backup – for entire hard drives
- Partition Backup – for specific partitions

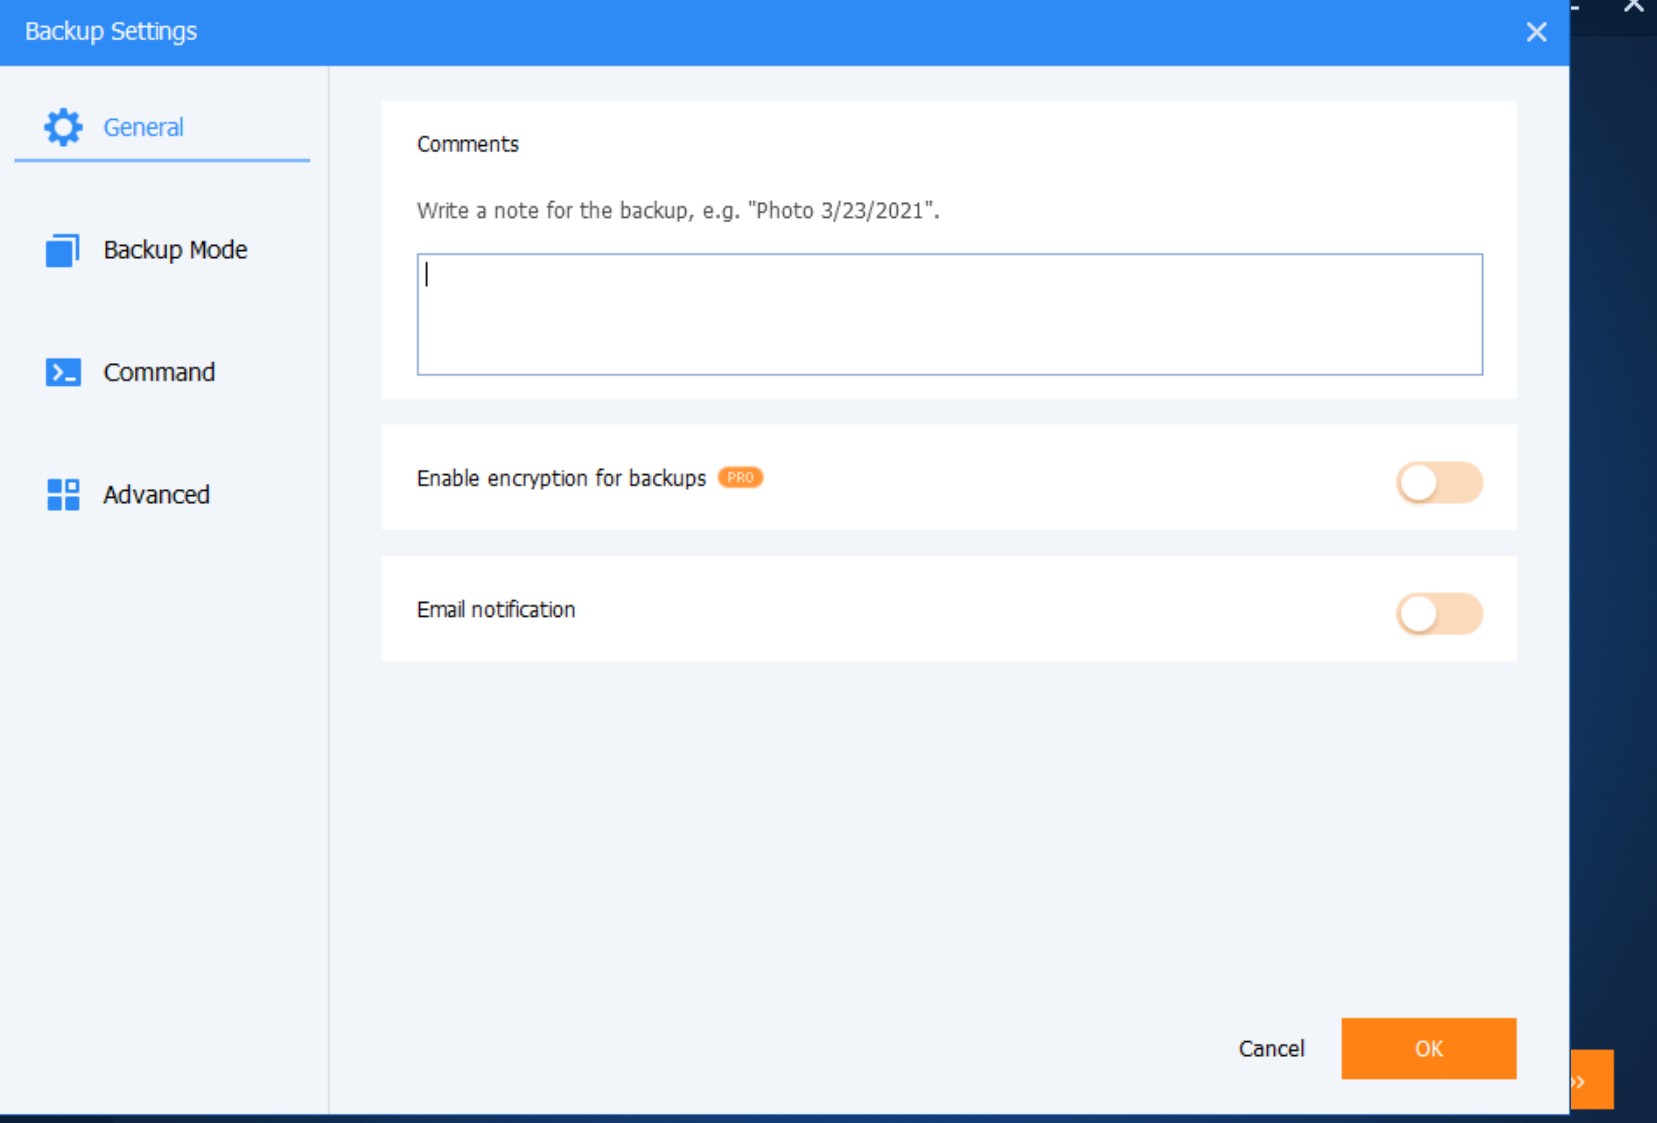
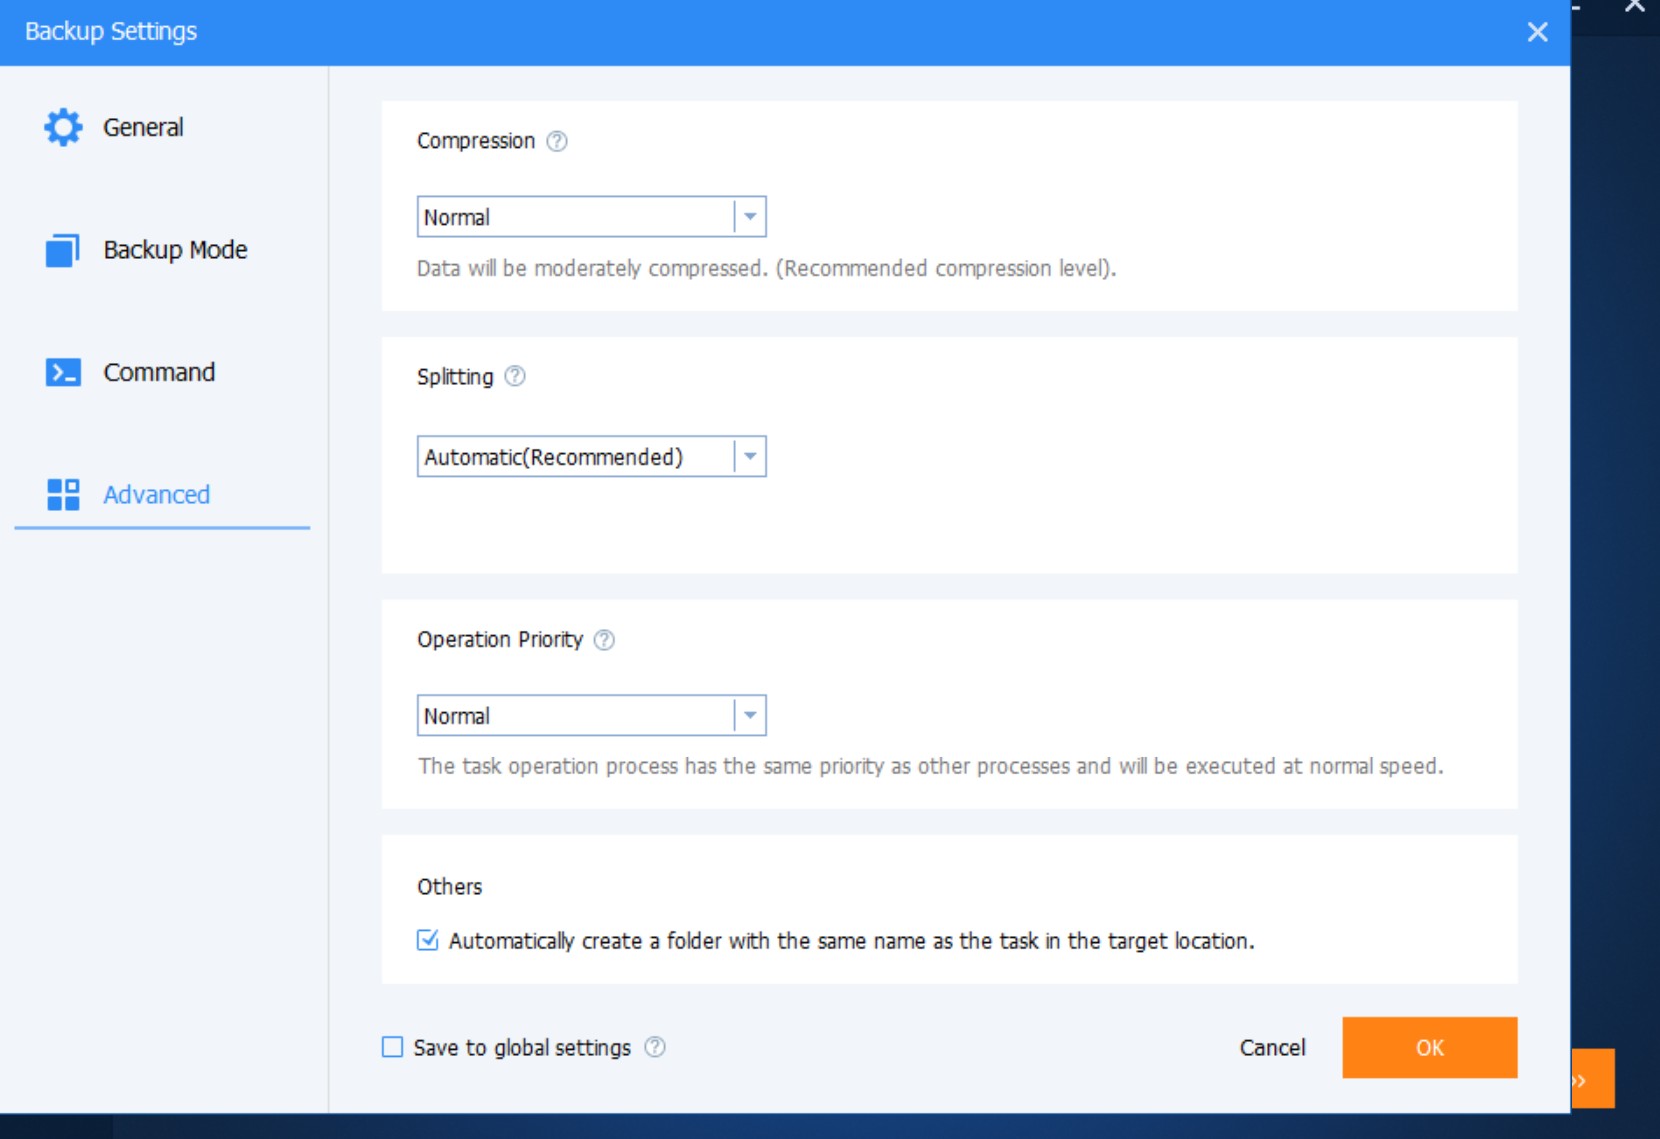
✅ Step 4: Configure Backup Settings
🗂️ Step 1: Select Backup Destination
Choose a location to store your backup:
- External hard drive
- USB flash drive
- Network location (NAS)
- Another internal drive
⚙️ Step 2: Customize Options
Click the Options button to:
- Enable compression
- Split large files
- Set up email notifications
Click Schedule to run automatic backups daily, weekly, or monthly.
✅ Step 5: Start the Backup
Click Start Backup and wait for the process to complete.
⏳ Depending on your system size, this might take several minutes to an hour.
📸 Screenshot of backup progress:
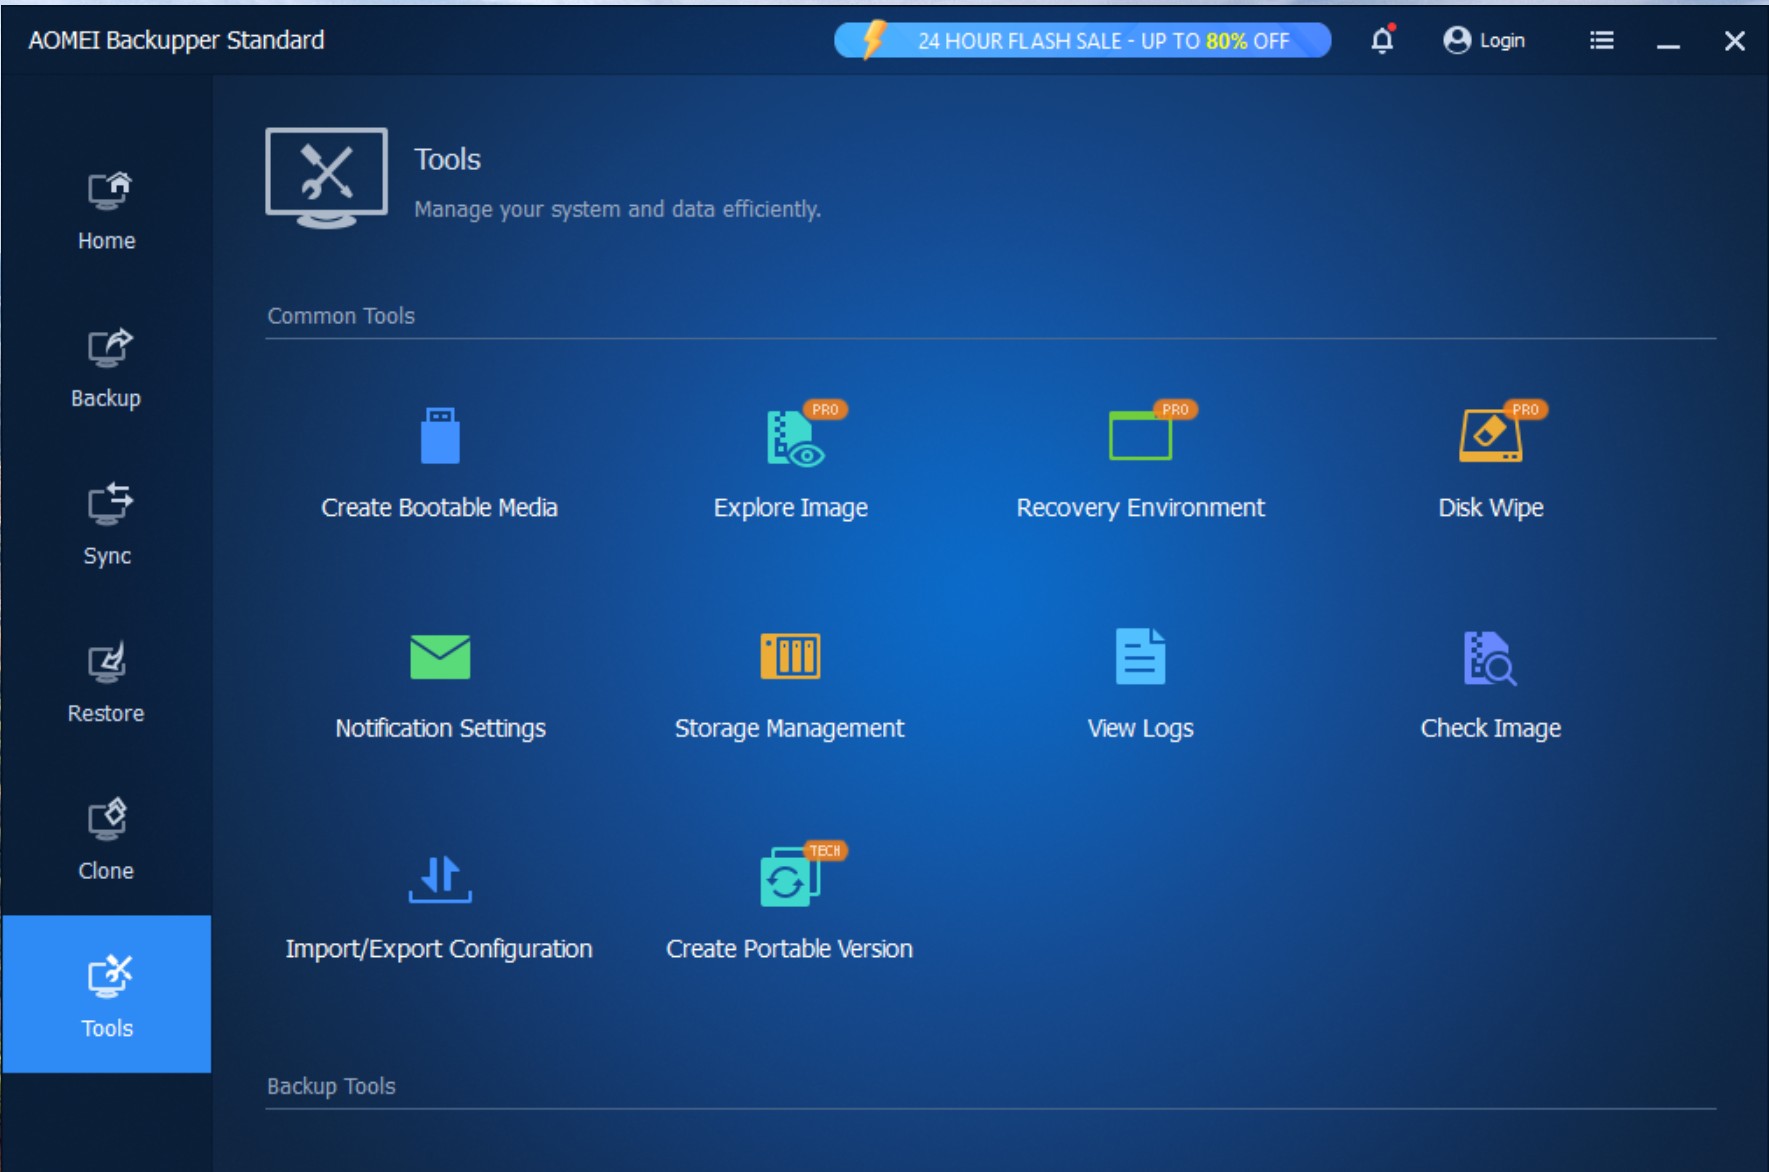
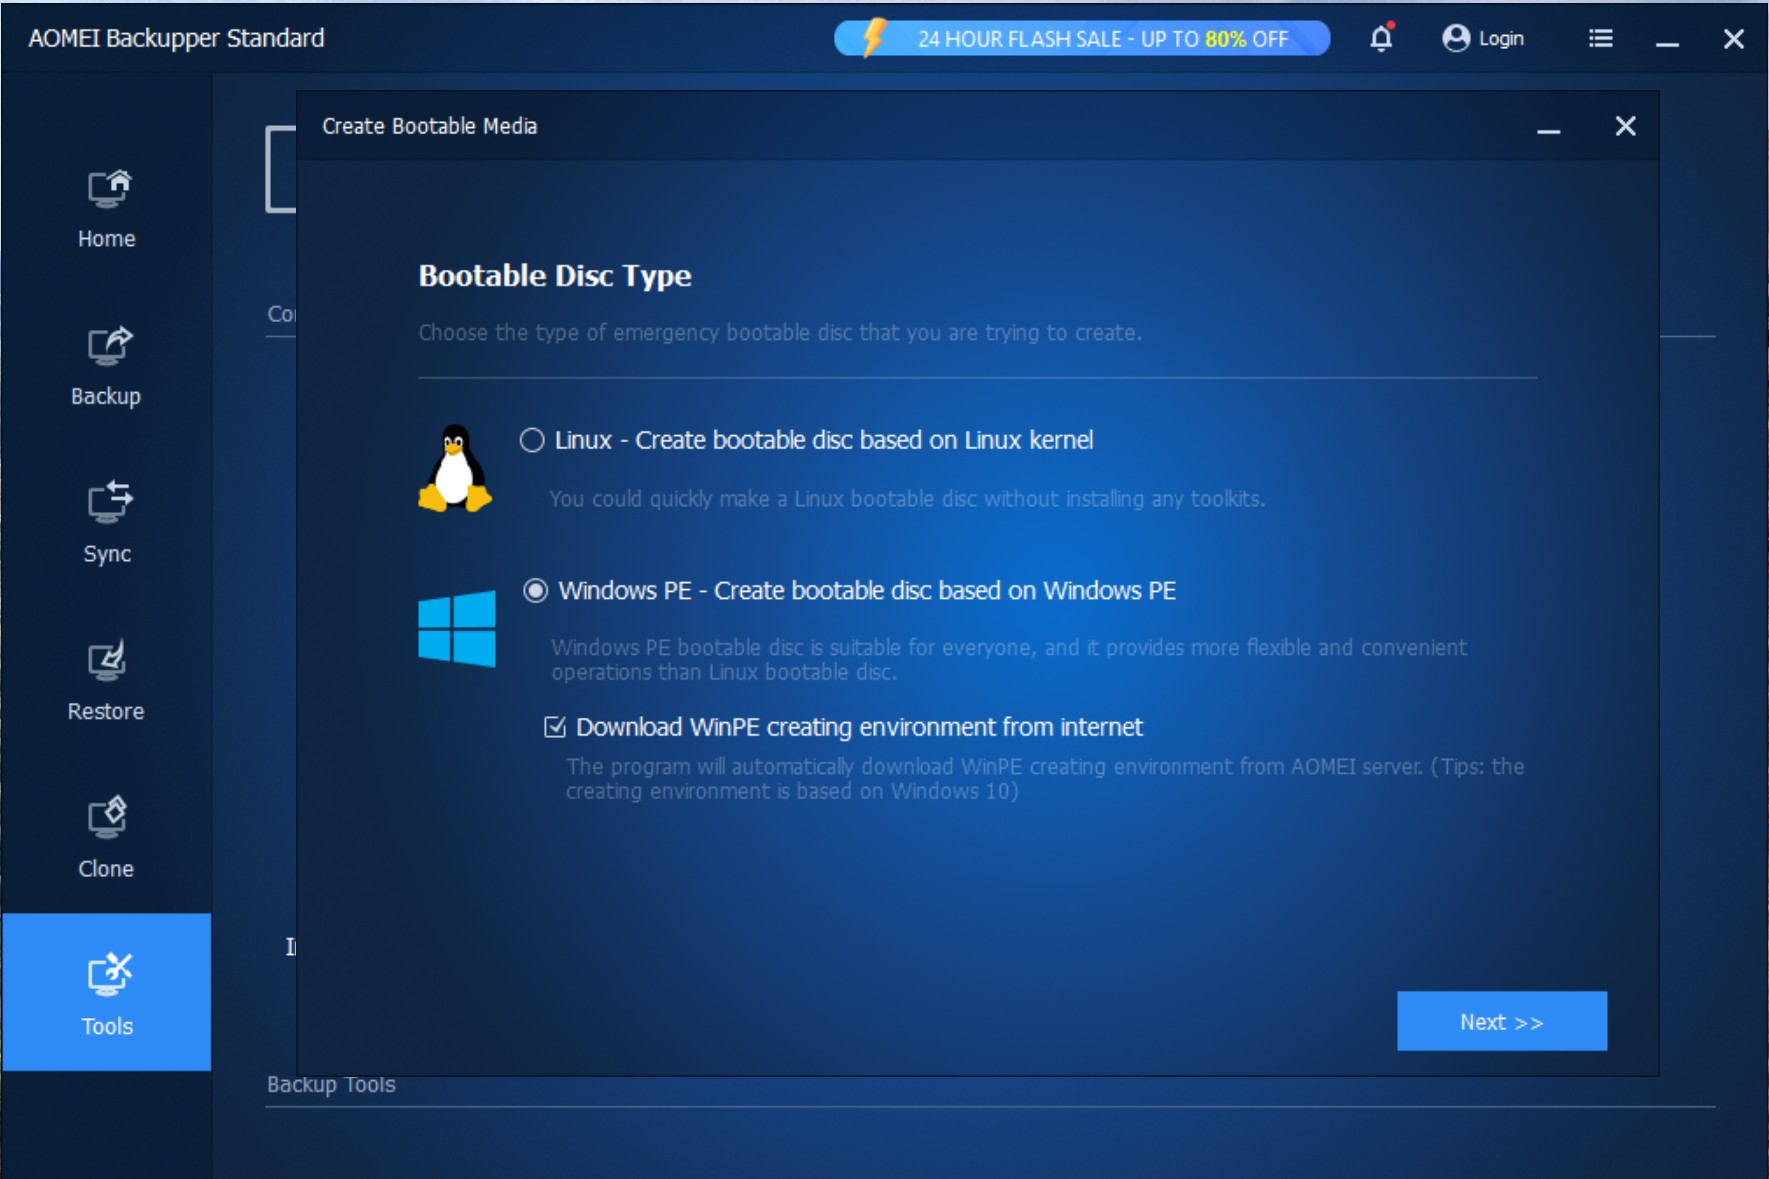
✅ Step 6: Create Bootable Media (Optional but Recommended)
To restore your system even if Windows fails to boot:
- Go to Tools > Create Bootable Media
- Choose Windows PE (default)
- Select USB drive or create an ISO image for recovery
💡 This is a lifesaver during serious system crashes!
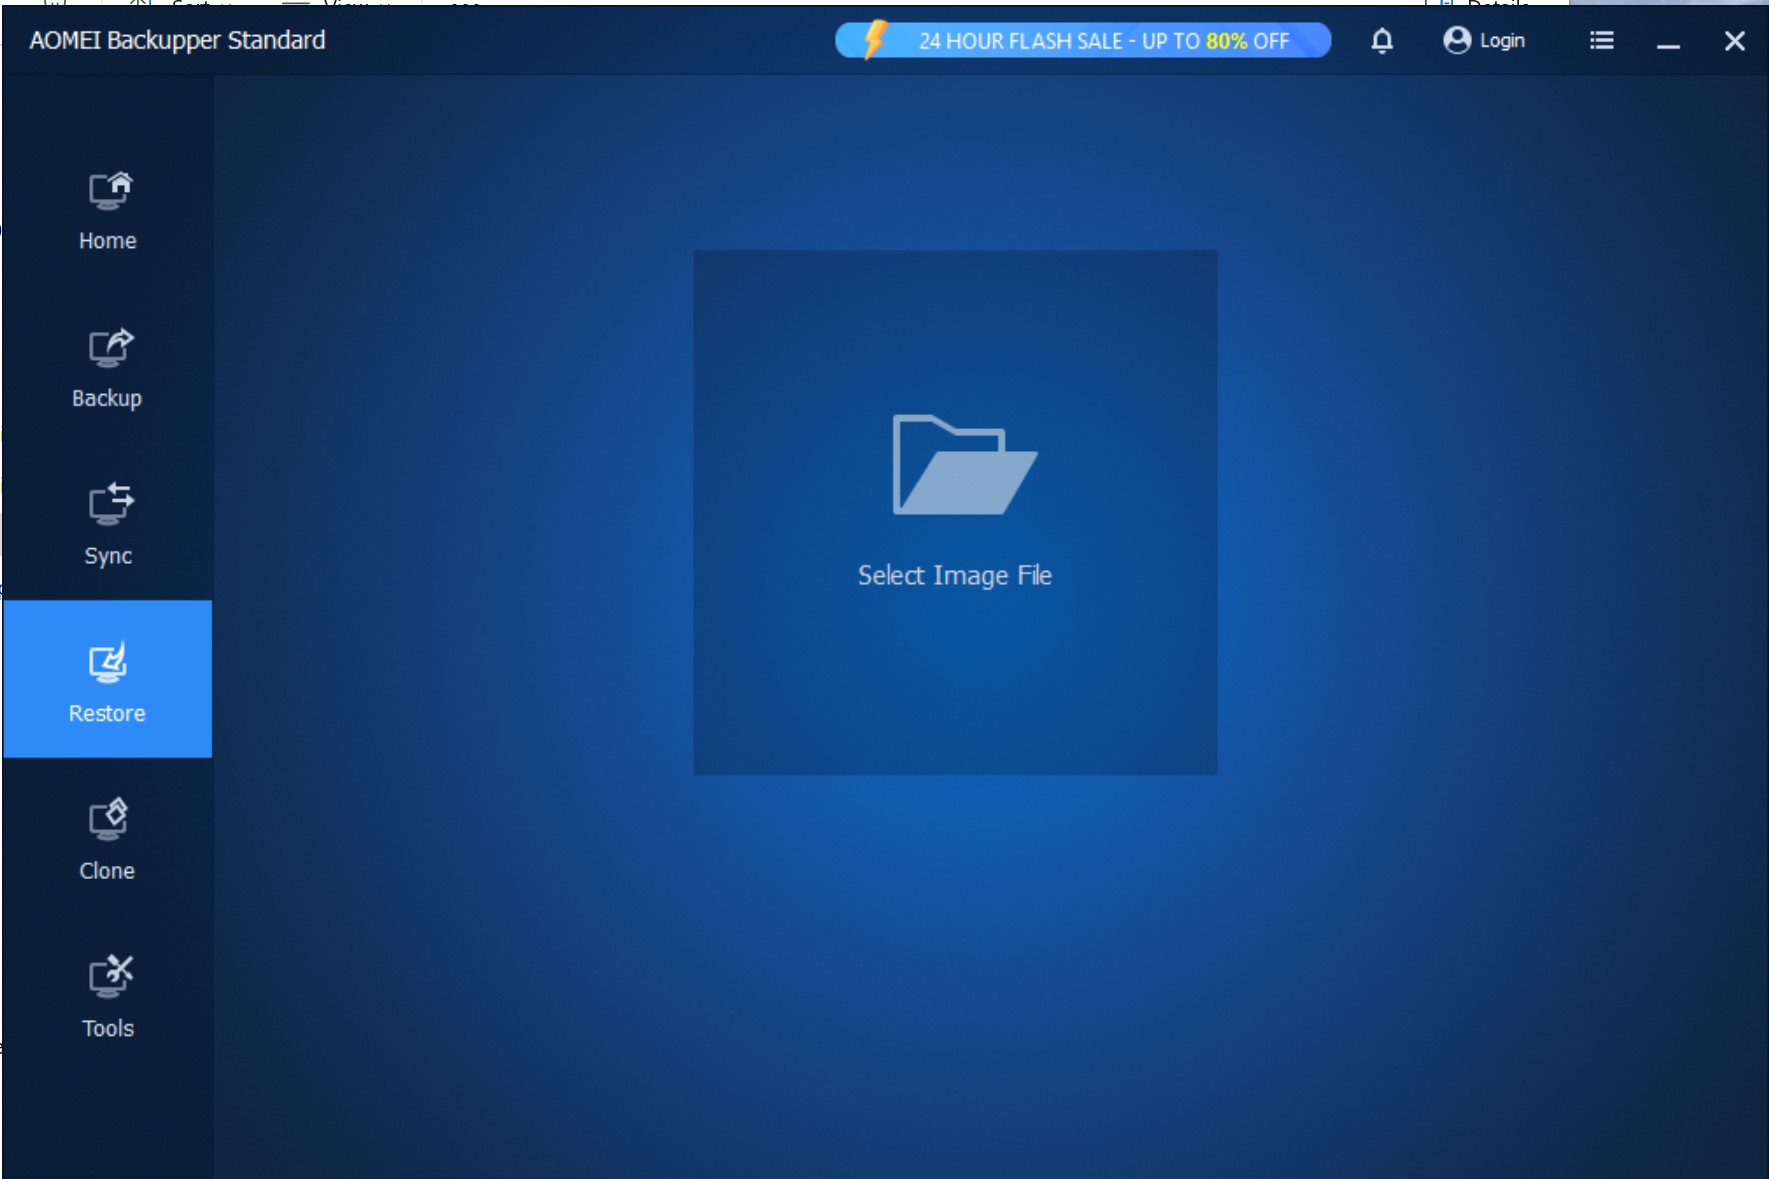
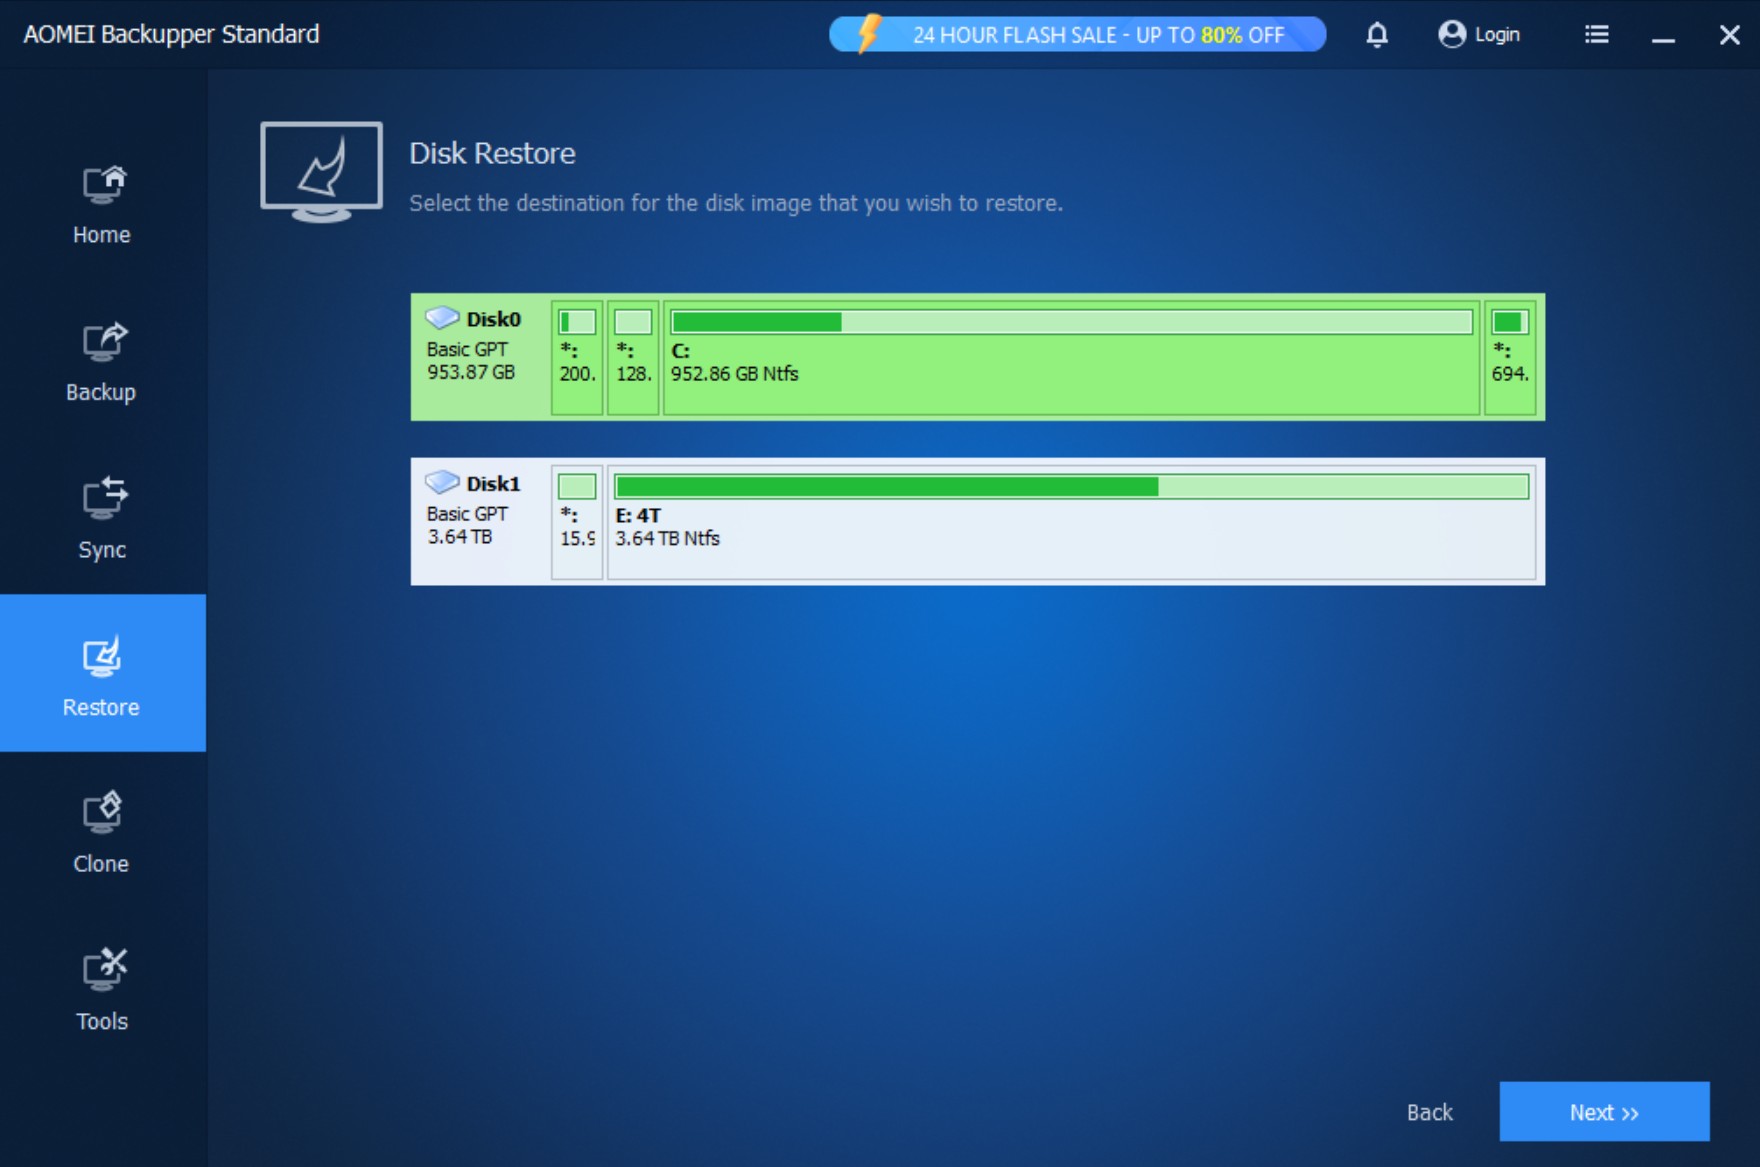
🔄 How to Restore a Backup
When needed, restoring is easy:
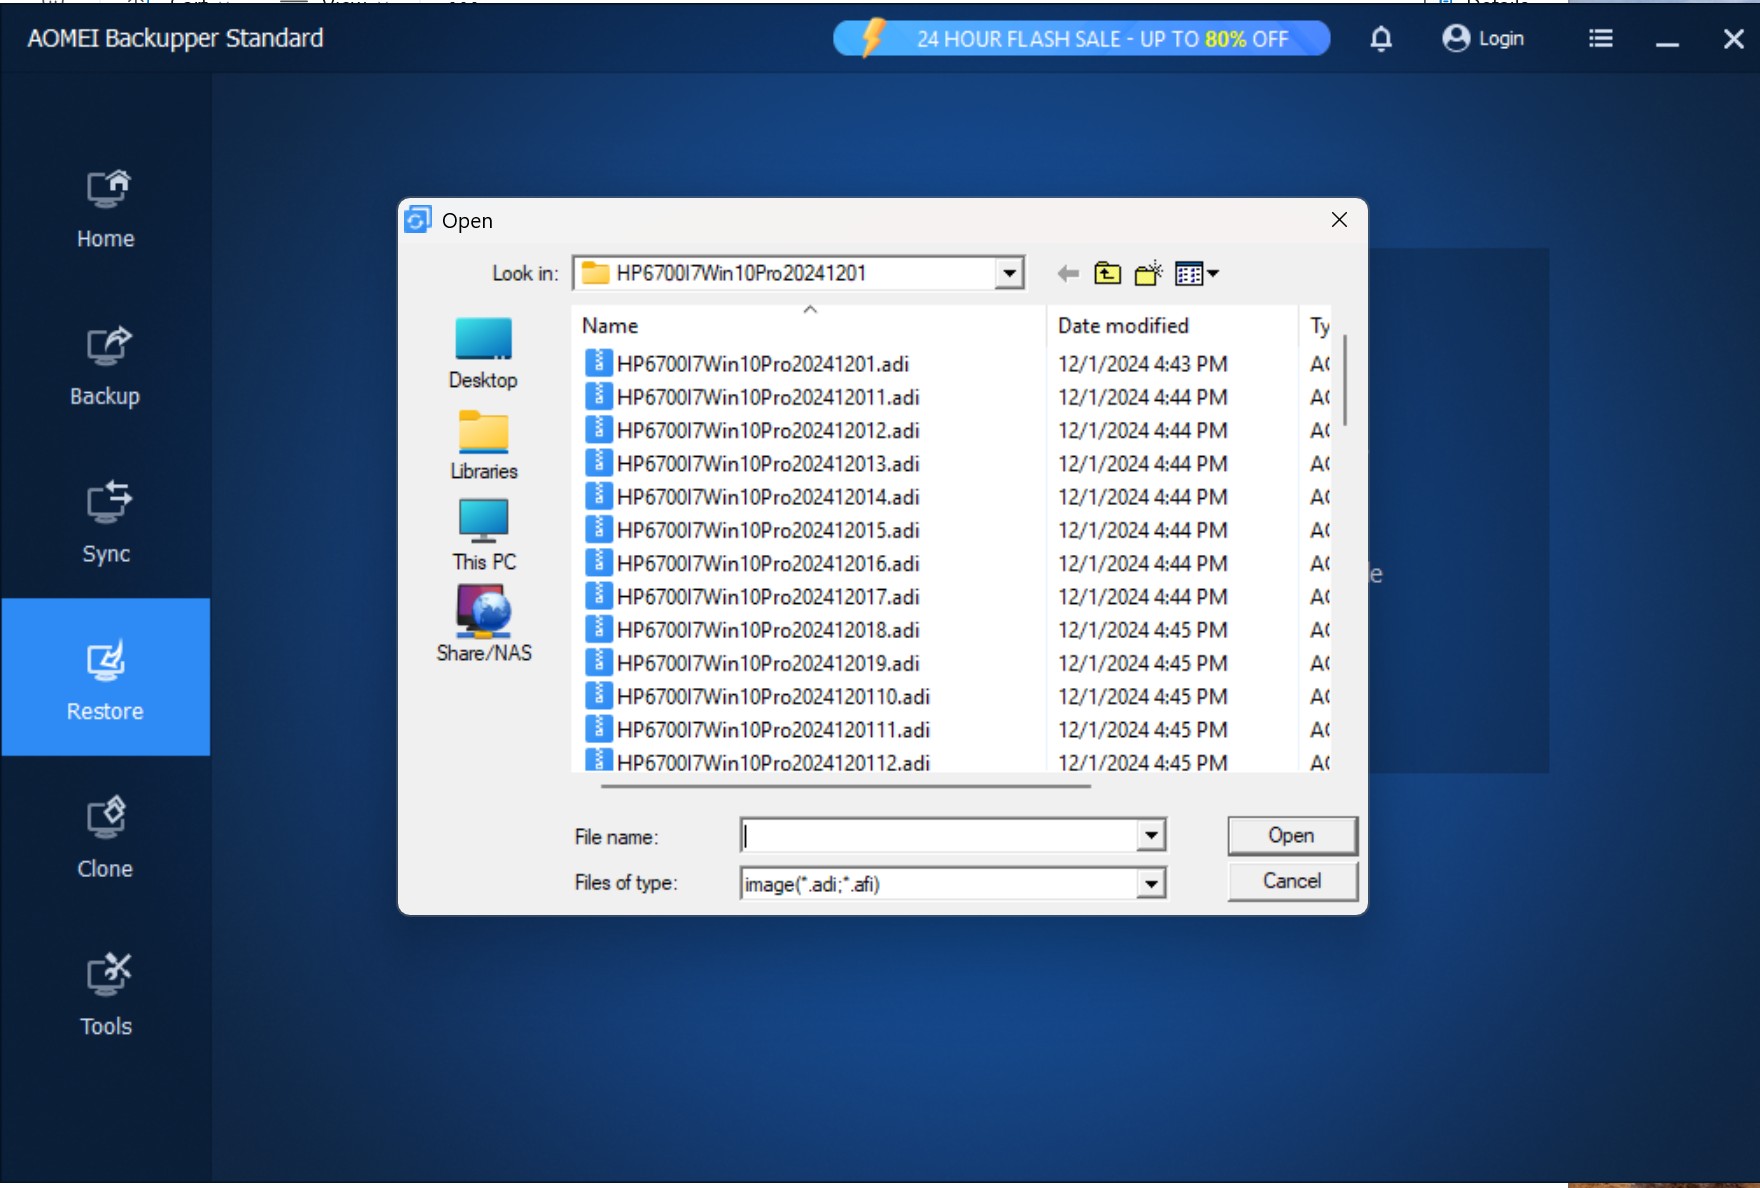
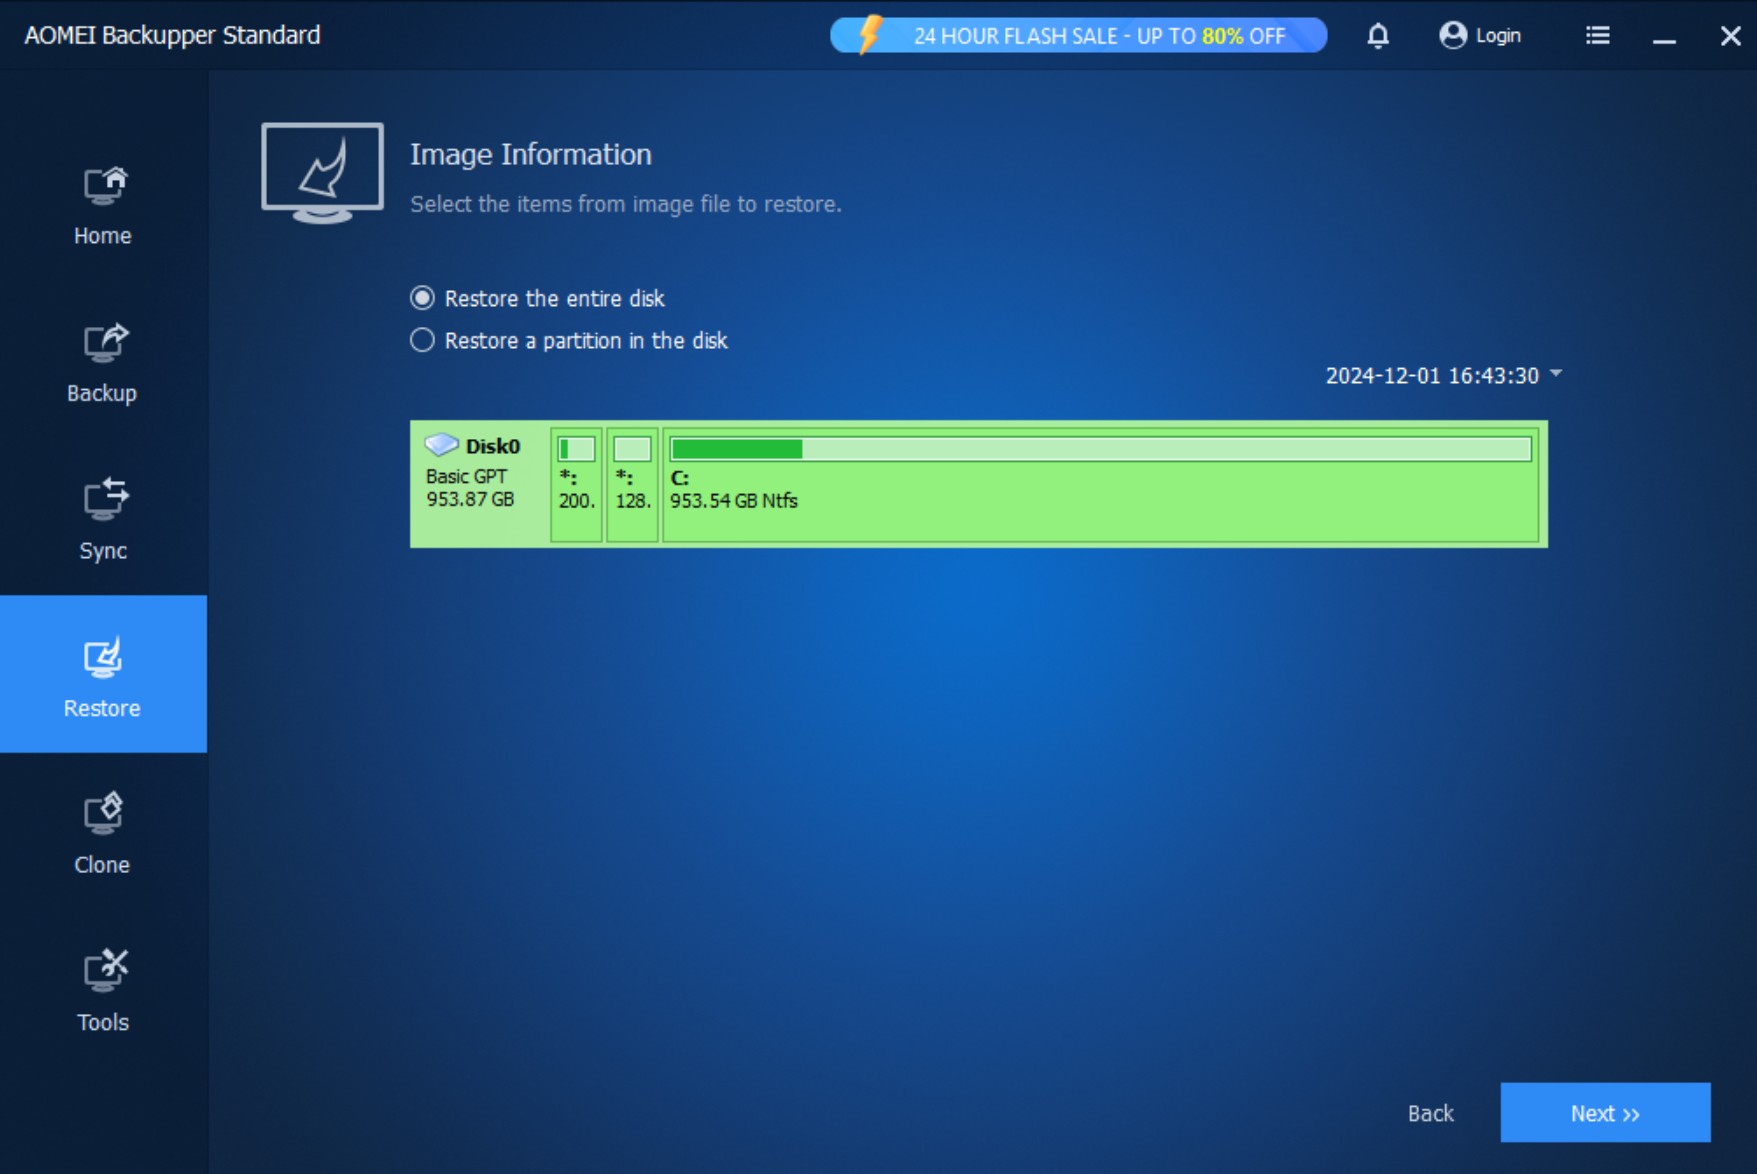
- Go to Restore > Select Task or Image File
- Choose the backup image (.adi file)
- Follow the on-screen steps to restore your system, files, or partitions
📸 Screenshot of restore interface:
📌 Final Notes
- 🔄 Backups are saved as
.adifiles - 📅 Free version supports full and scheduled backups
- 🔐 Encryption is only available in paid versions
Need more advanced features like differential backups, backup encryption, or clone utilities? Consider upgrading to AOMEI Backupper Professional.
If you need computer help, please contact us a4uinfosite@gmail.com


Leave a Reply
You must be logged in to post a comment.